
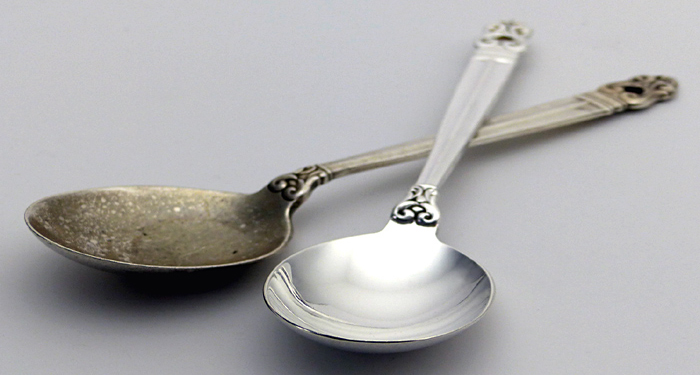
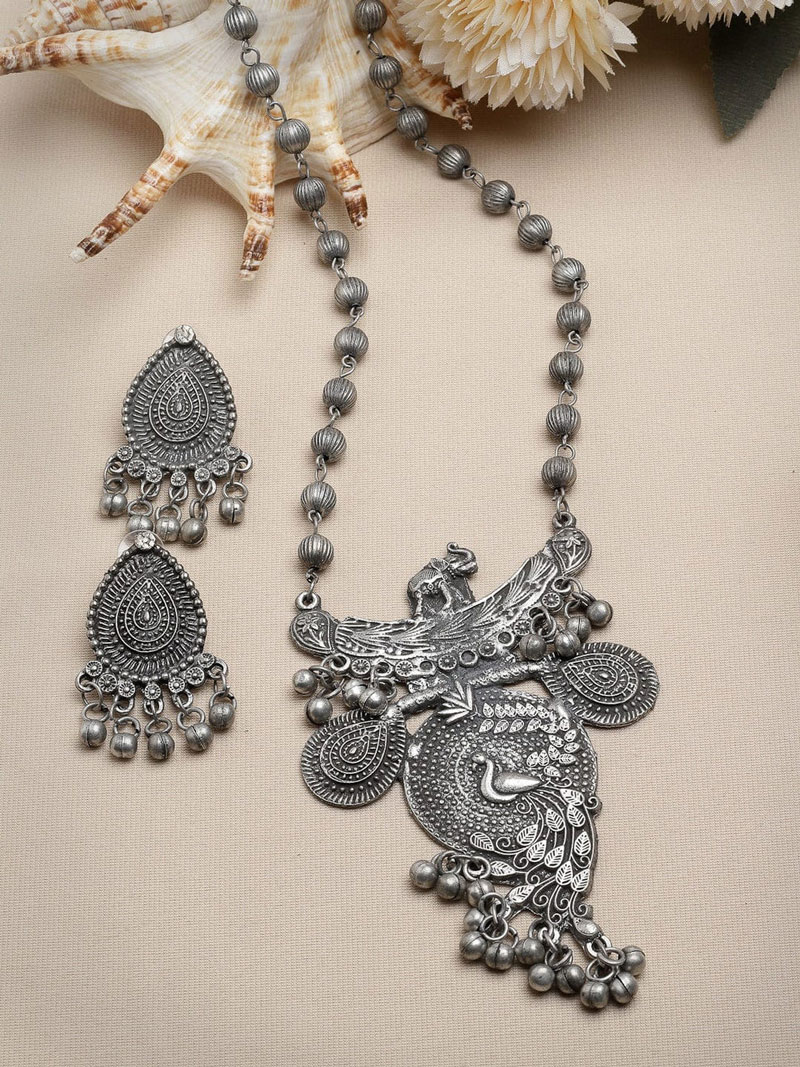
Silver jewellery – whether sterling silver (usually 92.5% silver alloyed with copper) or fine silver (99.9% pure silver) – is prone to tarnish over time. Tarnish is a dull, dark layer that forms when silver reacts with sulphur compounds in air, forming silver sulphide on the surface. While tarnish doesn’t destroy the metal underneath (unlike rust on iron), it hides the lustrous beauty of silver. Cleaning silver jewellery safely and effectively is crucial to restore its shine without causing damage. This guide provides an in-depth look at various cleaning methods for sterling and fine silver jewellery (excluding silver-plated items). It covers everything from simple polishing cloths and home remedies to advanced techniques like ultrasonic or steam cleaning, as well as special care for pieces with gemstones or delicate details. We’ll also highlight common mistakes to avoid and tips on storing silver to prevent tarnish.
Understanding tarnish and why silver darkens
Silver’s nemesis is tarnish – a discolouration that ranges from yellowish-grey to blue-black on the surface of the metal. Tarnish is primarily silver sulphide, which forms when silver reacts with sulphur in the air or from materials it touches. Common sources of sulphur include air pollution, rubber, certain foods (eggs, onions), wool, and even our skin oils. Sterling silver, which contains copper, may tarnish faster than fine silver because copper can also react (forming copper sulphides or oxides) and influence the tarnish colour. Fine silver, being almost pure, tarnishes more slowly and may simply get a dark grey film over time.
It’s important to note that tarnish itself is not permanent damage – it’s usually a thin, stable layer that can be removed. In fact, once a uniform tarnish layer forms, it can actually protect the underlying silver from further corrosion by sealing the surface. The real risk to silver comes from aggressive cleaning: over-polishing or harsh chemicals can wear away silver or detail along with the tarnish. Each time you polish, a minute amount of silver is removed. Over years, this can soften engraving, blur hallmarks, or even thin out parts of jewellery. Therefore, while regular cleaning is important to keep silver jewellery looking its best, it must be done gently and only as necessary. Preventing tarnish (through proper storage and occasional wiping) is better than constantly removing it.
Before cleaning any silver piece, identify what you’re dealing with. Make sure it’s solid sterling/fine silver and not just plated (our focus here is on solid silver; plated items have special challenges and can be ruined by vigorous cleaning. Also check for any special finishes or components: Is it oxidised silver (intentionally blackened details)? Is there a protective coating like e-coating or rhodium? Are there gemstones, pearls or other materials? All these factors affect the choice of cleaning method. In the following sections, we’ll explore a wide range of cleaning methods – from gentle polishing cloths to high-tech cleaners – and discuss how to use each safely on sterling and fine silver jewellery.
Cleaning cloths for silver jewellery
One of the simplest and safest ways to clean lightly tarnished silver is to use a cleaning cloth. Specialised silver cleaning cloths are soft, non-scratching cloths often infused with gentle cleaners or polishing agents. They are ideal for routine polishing and maintaining shine. Let’s look at the types of cloths and how to use them:
- Microfibre cloths: Ultra-soft microfibre cloths (or other lint-free cloths like 100% cotton flannel) are great for buffing silver and removing oils or light dirt. They won’t scratch the silver’s surface because they have fine fibres that lift particles away rather than abrade. Use a clean microfibre to gently rub the jewellery after wearing it – this will remove fingerprints and light tarnish before it becomes noticeable. Microfibre by itself won’t remove heavy tarnish, but it’s excellent for quick shine-ups and daily care.
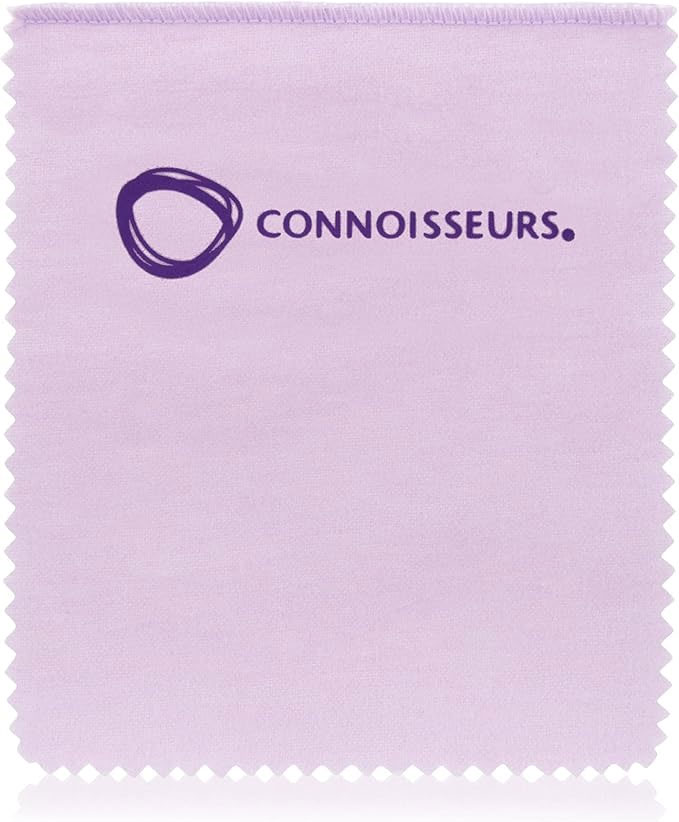
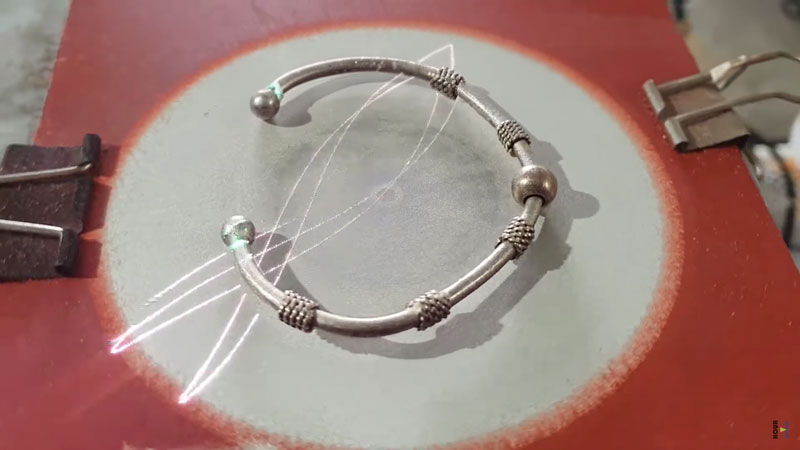
- Impregnated polishing cloths: Silver polishing cloths (like the one pictured above) are usually made of soft cotton flannelette impregnated with a very mild abrasive and chemical cleaners that remove tarnish. Examples include the classic “Sunshine” cloths, anti-tarnish cloths, etc. These cloths appear yellow, grey, or blue and have an unmistakable chemical smell from the polishing compounds. Using them is simple: rub the silver gently with the cloth. You’ll see black marks on the cloth as it picks up tarnish. The abrasive in these cloths is extremely fine, so they polish without scratching visible marks. They are gentler than liquid or paste polishes because the abrasive content is lower. Polishing cloths are best for light tarnish or final buffing after other cleaning. They can often restore a mildly tarnished chain or pendant to brightness with a bit of elbow grease. After using an impregnated cloth, you typically don’t need to rinse the piece (the residual chemical can actually help slow re-tarnishing slightly), but you can wipe with a clean dry part of the cloth to remove any powdery residue
- Anti-tarnish cloth (for storage): Note that anti-tarnish storage cloths (like Pacific Silvercloth) are different from polishing cloths. Storage cloths are usually brown or dark and embedded with silver particles or other chemicals that absorb sulphur from the air. You wrap your silver items in this cloth when storing to prevent tarnish. These cloths do not clean per se, but they slow down tarnishing by sacrificing themselves (the sulphur reacts with the silver in the cloth instead of your jewellery). When we discuss storage later, we’ll revisit these. Just don’t confuse them with polishing cloths – anti-tarnish cloth keeps silver from tarnishing, whereas polishing cloth removes tarnish.
Using cleaning cloths effectively:
- Make sure the cloth is clean and dry.
- If it’s a treated polishing cloth, do not wash it (washing removes the special chemicals).
- Rub the silver item back-and-forth or in small circular motions, applying light pressure. Focus on one area at a time. For chains, you can bunch the chain in the cloth and pull it through.
- Remember to get into crevices if possible – you can wrap the cloth around a toothpick or cotton bud to clean tight spots in patterns or links.
- Avoid using paper towel or tissues on silver; those contain wood fibres that can scratch metal. A proper soft cloth is essential to avoid hairline scratches.
Polishing cloths are a staple in any silver care kit because they are non-messy, reusable, and gentle. They work especially well on pieces that are regularly worn (and thus only slightly tarnished). For heavier tarnish, you may need to combine cloth polishing with other methods (like a silver polish or dip), which we’ll discuss next. But even after using other methods, a final buff with a soft cloth gives the best shine.
Silver polishes, creams and foams (mechanical cleaning)
When tarnish is too stubborn for a simple cloth alone, the next step is usually a silver polish. These are creams, pastes, or foams formulated to remove tarnish by mechanical action (abrasion) and often chemical action. They require rubbing the product on the silver, thus physically cleaning the surface. Let’s break down how to use them and their pros/cons:
How silver polishes work:
Most silver polishes contain mild abrasives (like chalk (calcium carbonate), alumina, or silica) that scrub off the layer of silver sulphide. They often also have chemicals like solvents or sulfamic acid that can help dissolve or loosen tarnish, plus binders and sometimes tarnish inhibitors. When you rub a polish on tarnished silver, you are essentially wearing away the tarnish (and a tiny bit of silver) to reveal clean metal beneath. Because this process does remove metal, it’s important to use the gentlest polish that gets the job done – especially on valued pieces or fine details. Conservators note that mild abrasive polishing is the safest cleaning method for most historic silver because it gives control and minimises material loss, whereas dips (chemical cleaners) might strip too much too quickly.
Types of silver polishes:
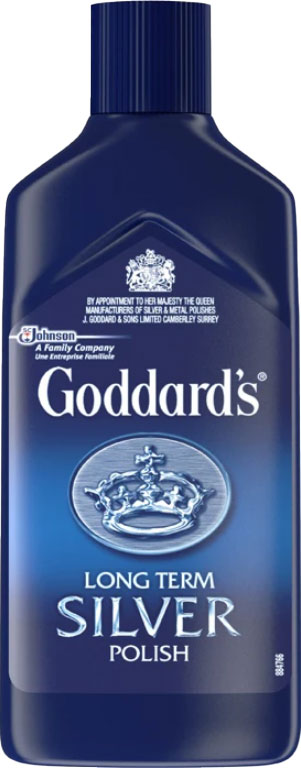
- Liquid and cream polishes: These are applied with a soft cloth or sponge, worked over the silver, then rinsed or wiped off. Examples: Wright’s Silver Cream, Goddard’s silver polish, Hagerty silver foam. They are formulated to be gentle but effective. Many contain a very fine abrasive and a chemical tarnish remover. Usage: Apply a small amount on a damp cloth or directly on the silver, gently rub until the tarnish fades, then rinse with water and buff dry. Liquid polishes can reach intricate areas to some extent (especially if you use a soft toothbrush or cloth-wrapped swab for crevices). Always rinse off residues thoroughly if the product instructions say so – residual polish can cause greenish deposits over time because many polishes contain ammonia or other ingredients that, if trapped in gaps, might corrode the metal or verdigris (especially on sterling with copper content). For instance, ammonia in some polishes can leach copper from sterling silver if left on. So, ensure all polish is removed from crevices by rinsing with water or using a damp cotton bud, then dry completely.
- Foam or paste polishes: Some polishes come as a foam that you apply with a damp sponge (like Twinkle Silver Polish). Others are paste in a jar that you rub on (sometimes called silversmith’s polish). These work similarly to liquid polishes. One advantage of foams is they often rinse off easily and are less likely to cake in details. Again, follow product directions – usually, you’ll apply, gently rub, then rinse and dry.
- Silver polish wadding:* Wadding polishes (e.g. Duraglit) are cotton wads pre-soaked in a polishing solution. You take a piece of the wadding and rub it on the silver. They’re convenient for small items. One thing to watch: wadding often leaves tiny fibres and dried polish residue behind, so after using it, wipe the piece with a clean cloth or brush out crevices. Wadding is useful for items that can’t contact water at all (since you don’t need to rinse; it uses solvents that evaporate).
Benefits of silver polishes:
They are effective at removing tarnish and generally safe for sterling and fine silver. You have control over the process – you can stop when the piece is clean enough, thus avoiding over-cleaning areas that might look better with a bit of patina (like engraved patterns where dark tarnish in recesses can make details stand out). Polishes also usually leave a nice luster since the mild abrasive smooths the surface. Many commercial polishes include a tarnish inhibitor that deposits an invisible coating to slow down tarnish re-forming. (These inhibitors give temporary protection – a few weeks or months – but are not permanent and, as noted in conservation sources, sometimes cause tarnish to appear unevenly later.
Risks or downsides:
The main caution is that all abrasive polishing removes a bit of metal. If done occasionally, the amount is negligible. But polishing very frequently (say weekly) or using a too-harsh polish can thin soft details over years. Avoid general metal polishes not meant for silver (like brass polish, chrome polish) – those tend to be more abrasive and can scratch silver or remove too much. Also, if a piece is silver-plated (again, we’re not focusing on those, but for awareness), abrasive polishes can eventually wear through the thin silver layer. Another tip: Do not use old or dried-out polish – if a polish paste has dried in its container, the fine particles may have clumped into larger grit, which can scratch more. Polishes should be smooth in texture. If in doubt, test on a less visible area or even on a piece of Plexiglas as CCI suggests – the scratch pattern on clear acrylic will show how abrasive the polish is.
How to clean silver jewellery with polish:
Use a soft cloth or sponge to apply the polish. Old t-shirts or soft cotton rags work well (ensure they’re clean). Rub gently – let the polish do the work, not heavy pressure from your hand. If the tarnish is heavy, it’s better to do multiple gentle applications than one forceful scrub. Frequently turn or switch your cloth so you’re using a clean section to avoid dragging around the removed tarnish which can cause micro-scratches. After polishing, rinse the jewellery in lukewarm water (or wipe with a slightly damp cloth) to remove any residual chemicals, then dry thoroughly with a soft towel. Use cotton buds or a soft toothbrush to get polish out of tiny holes or settings, followed by rinsing. Finally, buff with a microfibre or jewellery cloth to maximise shine.
If a polish alone isn’t doing the trick (e.g. for heavily tarnished pieces that haven’t been cleaned in years), you might need to resort to a chemical dip or an alternative method, which we’ll cover next. But remember: mechanical cleaning (polishing) is the gentlest overall method recommended by museum conservators for silver because it’s controlled and doesn’t risk sudden reactions. Many valuable antique silver pieces are cleaned with nothing more than cotton, chalk paste, and patience.
Chemical silver dips and cleaning solutions
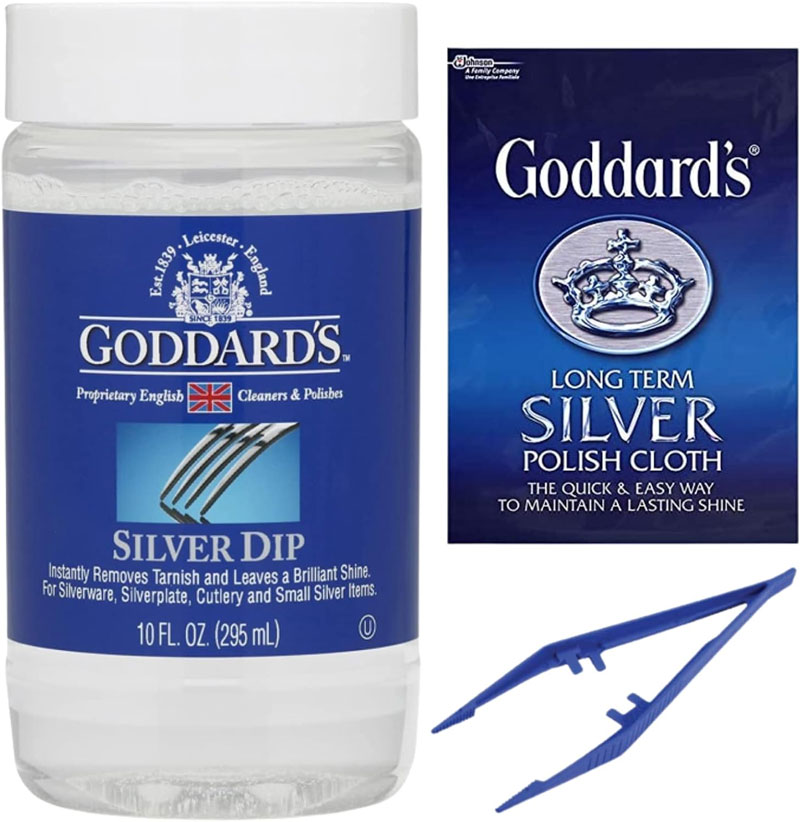
Silver “dips” or chemical cleaners are solutions designed to remove tarnish quickly by dissolving it. These are typically liquids in which you dip the jewellery, or a gel you apply and rinse off. They work chemically rather than by scrubbing. Popular brands include Hagerty’s Silver Dip, Goddard’s Silver Dip, and various generic “silver dip” jars. Let’s examine how they work, how to use them, and their cautions:
How silver dips work:
These products usually contain a mild acid (often sulphuric or phosphoric acid) plus a chelating agent like thiourea. The combination is formulated to attack silver sulphide (tarnish) and convert it into a soluble form that lifts off the metal. In essence, the dip dissolves the tarnish faster than it dissolves silver – but it does dissolve a tiny bit of the silver too. The reaction is much faster than hand polishing; within seconds or a minute, tarnish can vanish, even from intricate nooks.
Using a silver dip:
Always follow the product’s instructions, but the general method is:
- Prepare: Ensure the piece is sterling or pure silver only (no soft stones, no items that can’t be immersed – more on that in gemstone section). Remove any loose dirt by rinsing or gentle detergent wash first.
- Dip quickly: Submerge the silver item in the solution briefly – usually a few seconds to 10-20 seconds is enough for light tarnish. Do not leave it soaking for long periods; prolonged immersion can cause over-cleaning or even etch the silver. Many experts recommend a localised application instead of dipping: for example, use a cotton swab or soft brush to apply the dip only on tarnished areas, observing the change. This gives more control and avoids accidentally stripping all patina.
- Rinse thoroughly: The moment the tarnish is gone or significantly lightened, remove the piece and rinse it very well in clean water (preferably distilled water to avoid mineral spots). It’s crucial to wash off all chemical residues.
- Dry and polish: Pat the jewellery dry with a soft cloth. Often, after dipping, the silver might appear a bit dull or whitish – this is because there’s no tarnish left even in recesses, and sometimes dips can leave a slight film or cause a very fine roughening. A quick buff with a silver polishing cloth will restore the shine and remove any yellowish tinge that dips sometimes leave.
Effectiveness:
Dips are very effective at removing uniform tarnish, even in the tiniest crevices, without the labor of rubbing. They can make an old blackened piece look nearly new in seconds. For filigree or chains, dips can reach areas a cloth or brush might miss.
Risks and drawbacks:
Because they’re so powerful, they come with caveats:
- Over-cleaning and pitting: If left too long, dips can start dissolving the actual silver and cause pitting (tiny rough spots) on the surface. Always minimise exposure time – use them “as little as possible” to get the job done. Never leave silver unattended in a dip.
- Harsh on certain materials: Dips are acidic, so they will damage other materials often found in jewellery. Never use on pieces with pearls, turquoise, coral, or other porous/organic gems, as the acid can etch or dull them (more on gemstones later). Niello (a black silver sulphide inlay on some jewellery) can be damaged by dips since it’s essentially tarnish intentionally – acid will eat it. Joined pieces with glue (like a glued-in stone or pearl) can have glue weakened by the chemical. Avoid dips on any mixed-material jewellery (e.g., silver with wood, ivory, etc.).
- Not for hollow or un-openable pieces: If your silver item has hollow cavities (like a locket that doesn’t open, or a two-layer piece with a space in between), do not use a dip by immersion. The solution can seep into the cavity through tiny gaps and you’ll never be able to rinse it out completely, which can lead to ongoing corrosion inside. Similarly, if a piece has small drilled holes or channels (like some clasps or beads), be cautious that the dip can get trapped.
- Removes all patina: Aesthetically, chemical dips strip all tarnish evenly, which can make engraved or relief details lose contrast (an antique piece might look unnaturally bright with no dark in the recesses). This “over-cleaned” look might be undesirable if you value an aged patina in design crevices.
- Health and safety: The chemicals (acids and thiourea) in dips can be harmful if inhaled or on skin. Always use in a well-ventilated area and wear gloves. The odour can be quite strong (often a rotten egg smell because it’s reacting with sulphur). Avoid splashes – it can damage surfaces or fabrics.
- Follow-up needed: Dips often remove tarnish but not grime; you may need to clean the piece with soap and water after to remove any residual film. Also, as noted, a quick polish after dipping can really improve the final look.
In summary, silver dips are a “quick fix” for tarnish that should be used with care. They are great for things like chains or intricately patterned silver that is all-metal and can be safely rinsed. Many jewellers use dips as part of their cleaning process (for example, dipping a piece after ultrasonic cleaning to zap any remaining tarnish). If you use them sparingly and rinse well, they generally do not significantly harm sterling silver – but frequent use can lead to a slightly matte surface over time as a bit of silver is leached each time. As a result, some conservators prefer not to use chemical dips except in tough cases.
A tip if you prefer a non-toxic dip alternative: some companies make thiourea-free silver dips that use less hazardous chemicals, but the principle is similar. Always research the product’s active ingredients if you’re concerned. And remember, if a piece is valuable or you’re unsure, it might be better to consult a professional than to experiment with chemicals.
Next, we’ll discuss a popular home-chemistry method related to dips: the aluminium foil and baking soda technique, which is an electrochemical cleaning method.
Electrochemical cleaning (baking soda and aluminium foil method)
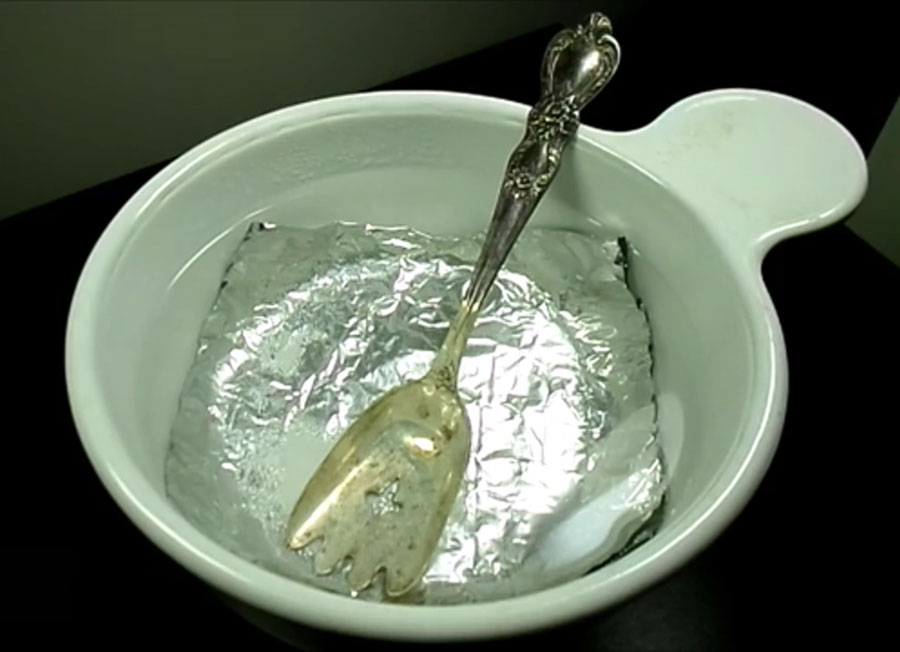
A favourite home remedy for tarnished silver is the aluminium foil + baking soda bath. This method isn’t abrasive; instead, it uses chemistry and electricity (on a small scale) to convert tarnish back into silver. It’s often touted as a quick, gentle fix you can do with household items. Let’s see how it works and the best practices for it:
How it works: The method involves submerging the silver item in a hot water solution of sodium bicarbonate or washing soda (sodium carbonate), in contact with aluminium foil. When aluminum (a more reactive metal) touches the silver in the presence of the baking soda solution (which acts as an electrolyte), a small galvanic current flows. The aluminium corrodes (oxidises), and the hydrogen produced in the process reduces silver sulphide (Ag₂S, tarnish) back to silver metal. In plain language, the tarnish is chemically transferred from the silver onto the aluminium. This is why you often see the aluminium foil getting dark or covered with sulphur smell while the silver lightens.
How to clean silver jewellery with electrochemical cleaning:
- Take a non-metallic dish (glass or plastic). Line it with aluminium foil, shiny side up, or use a piece of aluminum cookware (disposable aluminium trays work too).
- Place the tarnished silver pieces on the foil, ensuring they touch the foil or each other (contact with aluminium is necessary for the circuit).
- Add baking soda (sodium bicarbonate) – typical recipe is about 1 tablespoon of baking soda per cup of water. Some people also add a tablespoon of salt to improve conductivity, but baking soda alone can suffice.
- Pour in hot water (almost boiling). The hot temperature accelerates the reaction. You should see fizzing and might notice a sulphur odour (like rotten eggs) as sulphur transfers to the aluminium.
- Let the items sit for a few minutes, or until you see tarnish fading. Stubborn spots can be left a bit longer, or you can carefully reposition the piece to ensure good contact with foil.
- Remove the silver, rinse it thoroughly with clean water, and dry with a soft cloth.
There is a variation of this method that involves boiling the water in a pan for about four minutes.
This method can indeed remove heavy tarnish without rubbing. In fact, many users report it to be the “best overall” method for heavily oxidised silver because it gets into all the crevices. It’s also quite fun (the science experiment effect of fizzing and immediate results).
Benefits:
- It’s gentle on the silver surface since you’re not scrubbing (no scratches).
- It can handle intricate pieces easily (the solution reaches everywhere).
- It’s cheap and readily available (baking soda, foil, hot water).
- Unlike dips, it’s not strongly acidic or toxic – baking soda is mild.
- It’s quite fast – often tarnish disappears in minutes.
The aluminium foil and baking soda method is a popular home remedy for tarnish. In a hot water bath with aluminium foil, baking soda triggers an electrochemical reaction that lifts tarnish off the silver without abrasive polishing.
Risks/downsides:
- Overdoing it or improper use: If the aluminium foil becomes too coated or isn’t in good contact, the reaction can slow or even cause minor etching. For example, if you leave silver in a spent solution too long with foil that’s no longer reactive, there’s a risk of sulphur redepositing unevenly or some spots not fully reducing, which can cause dullness. It’s recommended to refresh the foil and solution for large batches or very tarnished items, and not to leave items in once they are clean.
- Matte finish or white appearance: Sometimes this method can result in a slightly dull, greyish-white finish on the silver. This happens because the silver that was in the tarnish is now redeposited as very fine silver particles on the surface. It’s basically pure silver powder that doesn’t reflect light well (hence a matte look). This is easily fixed by polishing lightly with a soft cloth to burnish that layer and restore shine.
- Quick re-tarnishing: There are anecdotal reports (and conservators have noted) that silver cleaned by electrochemical reduction may tarnish faster afterwards than silver that was polished. One theory is that the protective effect of a smooth, polished surface or residual inhibitors is absent, and the chemically cleaned surface might be micro-porous, allowing tarnish to form more readily. So, after using this method, it’s wise to give the piece a good rinse (removing all baking soda residues) and a light polish and then store it properly to slow tarnish.
- Not suitable for:
- Pieces with glue or adhesives: Hot water can soften glues (e.g., in costume jewellery or pearl stringing).
- Delicate stones or finishes: While the solution itself isn’t harsh chemically on most stones, the heat could damage heat-sensitive gems. And if the piece has an oxidised (blackened) finish intentionally, this method will remove that oxidation too (just like a dip would).
- Hollow items or items with inset components: Similar caution as dips – if it’s something like a piece with a hollow chamber, you might get solution trapped inside.
- Sulphur odour and disposal: It can smell bad (that’s normal as tarnish is literally being converted to hydrogen sulphide gas). Also, once done, you have a solution with sulphur and aluminium sludge – it’s generally safe to pour down the drain with plenty of water, but rinse the sink well. If you used a lot of salt, be mindful of pouring a very salty hot solution on certain sink materials.
Overall, the aluminium foil method is a convenient at-home technique that, when used correctly, is effective and preserves detail. It’s basically a DIY version of what some professional “ionic cleaners” do (we’ll mention those in advanced techniques). Just remember to finish by buffing the piece to a shine. Think of this method as removing the bulk of tarnish chemically, and then you still might do a quick once-over with a polishing cloth for perfect results.
Ultrasonic cleaners: how and when to use them
Ultrasonic cleaning machines are a common tool in jewellery stores and workshops, and smaller versions are available for home use. They clean by sending high-frequency sound waves through a cleaning solution, which knocks dirt and grime off the item. But ultrasonic cleaners have to be used carefully with silver jewellery, especially if stones are involved, and they do not remove tarnish chemically (unless you add a tarnish-cleaning solution). Let’s break it down:
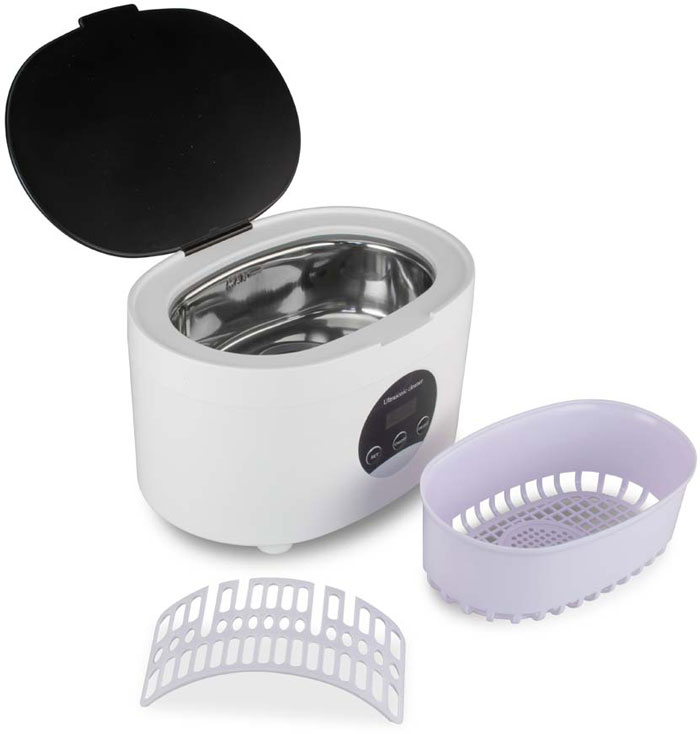
How ultrasonic cleaners work:
An ultrasonic cleaner has a tank that you fill with water or a special cleaning solution. The machine generates high-frequency sound vibrations that create millions of tiny bubbles in the liquid (a process called cavitation). When these microscopic bubbles implode near an object, they act like tiny scrubbing brushes, dislodging dirt, grease, and debris from the surface and crevices. For jewellery, this means it can reach into settings, around prongs, and in chain links where a cloth or brush might not reach, shaking loose accumulated grime.
What ultrasonics are good for:
They excel at cleaning oils, polishing compound residue, and general dirt off jewellery. For example, a silver ring that’s lost its sparkle because of skin oils, lotion, or fine debris around a gemstone can benefit from a minute or two in an ultrasonic – it’ll come out free of that gunk, often restoring brightness (especially of gemstones). Ultrasonics can remove loose tarnish (e.g., if a piece has flaky tarnish or built-up polish residue that looks dull, it might shake that off), but by itself, plain ultrasonic cleaning won’t chemically convert dark silver sulphide to shiny silver. If you want to remove true tarnish in an ultrasonic, you’d need to use a cleaning solution that contains ingredients to attack tarnish, or pre/post-treat with a dip or polish.
Using an ultrasonic cleaner safely:
- Choice: Take care when you buy your ultrasonic – get a known brand like Durston from a respectable seller. There are tonnes on Amazon but Amazon is a marketplace not a shop – and its sellers are not all reputable. Sometimes the electronics that you can buy on the platform are not safe.
- Solution: For silver, use a recommended jewellery cleaning solution or a mild detergent mixture that is non-ammoniated and non-acidic. Many jewellery ultrasonics come with a concentrate you mix with water. A mild dish soap in water can also work. There are special solutions labelled for silver that contain tarnish inhibitors or very mild tarnish removers. Always ensure the solution’s pH is neutral or near-neutral (some experts suggest checking with pH strips), because if it’s too high (basic) or contains chemicals like ammonia, it could potentially react with sterling silver (remember ammonia can attack copper in sterling). Never use bleach or chlorine in ultrasonics (chlorine aggressively pits silver).
- Process: Place the jewellery in the ultrasonic’s basket (never directly on the tank bottom) so it’s fully submerged. Turn on the machine according to instructions, typically for 1 to 5 minutes. You often see a fizz or hear a buzz.
- Time: Do not “overcook” your silver in an ultrasonic. Often 20 seconds to a couple of minutes is plenty. Leaving silver for too long has been reported to sometimes cause a whitish frost on the silver – possibly due to microscopic etching or a phenomenon akin to galvanic stripping. We suggest no more than 15 seconds for silver in an ultrasonic, else it could start an “electro-stripping” effect that removes metal at high points. While this risk is not universally agreed upon, the consensus is still that short durations are safest for silver pieces.
- Temperature: Many ultrasonics heat the solution or have a heater. Warm solution cleans better, but excessive heat can be bad for certain stones and can even accelerate tarnish if sulphur is present (there’s a story of silver items turning black in an ultrasonic because the water had sulphur contamination). So, use only moderate heat. If your machine has a heater, around 40-50°C (104-122°F) is plenty.
- Rinse and dry: After ultrasonic cleaning, rinse the jewellery in water to remove any dislodged dirt or cleaning solution, then dry with a soft cloth. An ultrasonic will often clean so well that the silver looks brighter, but if any tarnish remains (dark spots), you may still need a quick hand polish on those spots.
When to avoid ultrasonics:
This is critical – not all jewellery should go in. For silver with gemstones or other components, see the special section on gemstones below for detailed warnings. In short, never ultrasonic porous or delicate gems (pearls, opals, coral, turquoise, etc.), nor any stones with fractures or treatments. Many coloured gems could be damaged or their treatments ruined by the heat/vibration. Also, if a stone is loose in its setting, the vibrations could make it fall out. Always inspect for secure settings first. For silver-only items (no stones), ultrasonics are generally safe as long as you follow the time and solution guidelines. One thing to watch: if the silver has any antique oxidised finish (intentional blackening), ultrasonics could remove some of that if the cleaning solution has any chemical action, or if it knocks out oxidisation in flaky areas. Plain water ultrasonic won’t strip patina, but it might lighten it if the patina layer had loose particles.
Effect on tarnish:
Without a special solution, ultrasonics won’t magically remove tarnish – you might take a tarnished silver bracelet out of an ultrasonic and find it’s still tarnished (clean, but tarnished). People sometimes combine methods, e.g., ultrasonic first to clean dirt, then a quick dip to remove tarnish, then rinse and polish. This two-step can be very effective: the ultrasonic ensures all grime is gone (so that the chemical can reach the metal), and the dip zaps the tarnish.
In summary, ultrasonic cleaners are a valuable tool for cleaning dirt and build-up off silver jewellery, especially chain maille, chains, or detailed pieces with no vulnerable stones. They can be used on plain silver items to save manual brushing. However, they should be used cautiously and not as a one-size-fits-all solution. They are part of a professional jeweller’s arsenal but even jewellers know their limits: when in doubt about a piece, don’t put it in the ultrasonic. There are always other methods if you’re unsure.
Steam cleaning and other advanced techniques
Beyond polishing and ultrasonics, professional jewellers often use steam cleaners to blast away dirt, and there are other niche techniques (like laser cleaning or ionic cleaners) used in certain scenarios. Here we’ll focus on steam cleaning and mention those other techniques.
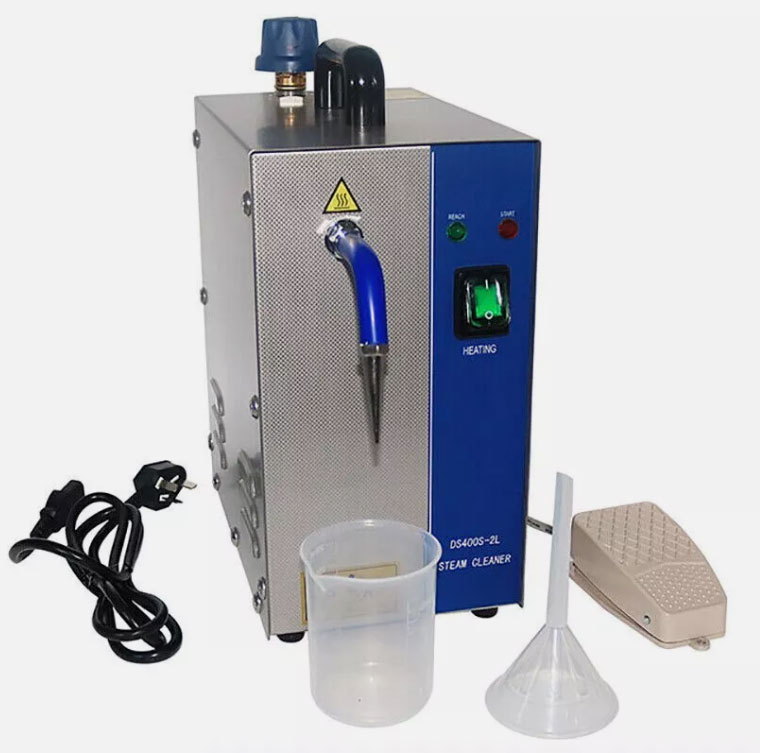
Steam cleaning:
Jewellers have high-pressure steam jets that shoot out very hot steam (water at or above boiling point) to clean jewellery. The intense heat and pressure literally melt away greasy residues and flush out dirt. For example, after polishing a ring with compounds, a jeweller will often steam it: the steam gets into tiny gaps and removes the grime instantly. For consumers, personal jewellery steam cleaners are available (they heat water and release a directed steam burst).
- Effectiveness: Steam is excellent for removing oils, polishing rouge, wax, or other contaminants. It can give metal a final pristine finish. It also sanitises. For silver, steam cleaning will not remove sulphide tarnish chemically, but it may loosen and blow off any loosely adhered tarnish film or polish residue. Mostly, think of it as a high-powered hot wash for jewellery.
- Risks: Heat and thermal shock are the main concerns. The steam can heat a piece of jewellery rapidly, and if a gemstone or the metal has any inclusions or weak points, the rapid expansion can cause cracks. Gems with internal inclusions of different materials (or even tiny fluid pockets) can literally explode or fracture from a sudden temp change. Even a diamond, if it has an included mineral with different expansion rate, can risk damage under steam (though diamonds are often steamed routinely if they are known to be sturdy). Generally, only very durable gems like diamond, ruby, sapphire, and maybe cubic zirconia are considered safe for steam – and even then, not if they have fractures or fillers. Soft stones (turquoise, opal, pearl, etc.) should never be steam cleaned. Also, if a piece has any glued element (like a glue-set stone or enamel piece), steam can soften or eject it.
- Technique: If you use a home steamer, handle the jewellery with tweezers or similar (don’t hold with fingers – steam can cause burns!). Blast the piece a few inches away from the nozzle for a second or two, then turn it and repeat, rather than continuous long blasts. If a piece is cold, some recommend pre-warming it slightly in warm water to lessen shock. Likewise, after steaming, don’t immediately cool the piece; let it air cool or dip in warm water then let cool gradually.
- When to use: Steam is particularly useful after other cleaning steps, as a final cleanse. For instance, after you polish and rinse a piece, a steam blast will remove any lingering residue and water spots. In professional settings, steam is often combined with ultrasonic: pieces are ultrasonically cleaned, then steamed to flush out remaining dirt and dry them.
Other advanced techniques:
Ionic cleaners:
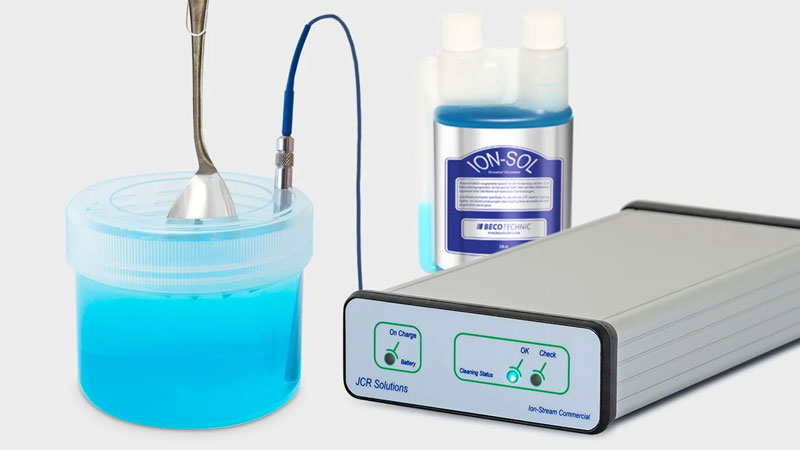
These are devices that use a mild electrical current in a cleaning solution (but not ultrasonic vibrations). One example is the “Speedbrite” ionic cleaner. You submerge the jewellery and a small current flows, which, like the foil method, transfers tarnish from the silver to a plate or metal piece. Ionic cleaners effectively remove tarnish even from pieces with delicate stones because they operate at room temperature and without vibrations. They are generally safe for things like pearls or soft stones because the process is gentle (the companies often advertise that). This is a great method for cleaning silver jewellery that you wouldn’t put in an ultrasonic or dip – for instance, a silver necklace with turquoise could be cleaned in an ionic cleaner to remove tarnish without harming the turquoise. The only downsides: ionic cleaners still require the piece to be conductive (so if parts are not metal, it won’t directly clean those), and they can’t remove grease as effectively as ultrasonic (so often a mild detergent is used in the solution). They are considered safe and are used by some museums for delicate pieces.
Laser cleaning:
This is more in the realm of art conservation or high-end repair – a focused laser can vaporise tarnish on metal without chemicals. It’s not something you’d use for routine jewellery care, but worth noting that such high-tech methods exist for things like removing corrosion on historical artifacts.
In practice, steam and ultrasonic cleaning are often used together by professionals, and if tarnish remains, a quick tarnish dip or polish is done. These advanced methods are not typically required for most home care scenarios, but understanding them helps you know what a jeweller might do if you take your piece for professional cleaning.
Speaking of which, when should you consider professional cleaning, and what do they do? Let’s cover that next.
Professional cleaning services: when and what to expect
Sometimes, it’s best to leave it to the professionals. Jewellers and specialised silver restorers have the experience and equipment to clean jewellery safely, especially valuable or fragile pieces. Here’s when you might opt for professional cleaning and what typically happens:
When to go pro:
- Your jewellery has valuable gemstones or delicate settings and you are not confident cleaning it yourself. For example, an antique silver ring with a fragile opal, or a piece with many pave-set stones that you fear losing.
- The piece is heavily tarnished or very dirty, and you want it restored to like-new condition without risk.
- There’s damage or needed maintenance along with cleaning – e.g. a stone is loose, prongs are bent, or the silver is scratched and you want it polished professionally (polishing deep scratches out of silver often requires a buffing wheel).
- The jewellery has a special finish (rhodium plating, patination, etc.) that you want to preserve or reapply.
- Simply for convenience or if you don’t have the tools: Many jewellers offer free or low-cost cleaning for pieces, especially if purchased from them. If you’re getting an annual check-up for ring settings, they’ll usually clean the ring as part of that.
What professional jewellers/conservators do:
- Inspection: They will first check the piece for loose stones, defects, or anything to protect. A good jeweller will note if any stones shouldn’t go in ultrasonic or if a certain method might harm the piece, and adjust accordingly.
- Pre-cleaning: Often, if the piece is tarnished, they might use a tarnish dip or ionic cleaner briefly to remove the bulk of tarnish (unless it’s deliberately oxidised piece). If the piece is just dull with no tarnish, they may skip straight to mechanical cleaning.
- Ultrasonic & steam: A common routine is to ultrasonic the piece to remove dirt, then steam it. This cleans out all the debris. If stones are present and safe for these methods (diamonds, sapphires typically), this will get them sparkling again. For stones that can’t be ultrasoniced or steamed, a pro will gently clean those by hand (e.g. using a soft brush and mild detergent).
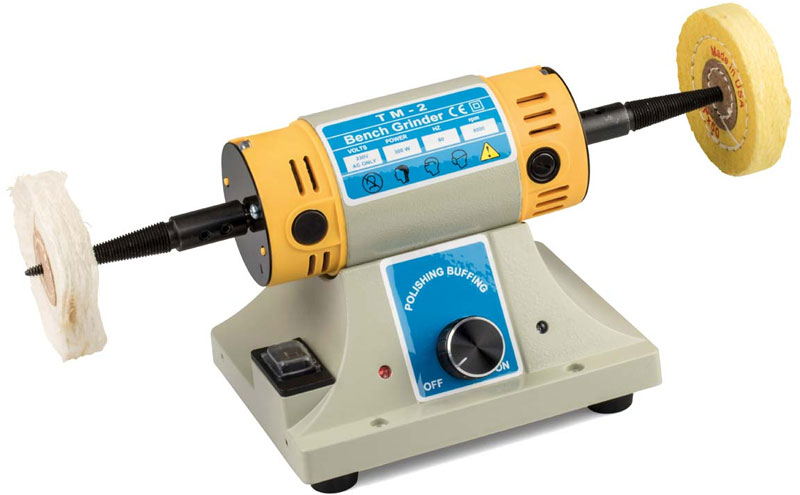
- Polishing wheels: To really restore shine, jewellers often use a motorised polishing wheel (buffing wheel) with polishing compounds (rouge, etc.) to buff the silver to a high shine. This can remove fine scratches and tarnish very efficiently. It’s basically what silversmiths use to finish pieces. The result is a fresh-looking piece, but note it does remove a thin layer of metal; a jeweller will be careful around hallmarks or fine details not to over-polish. Filigree or engraved items might be hand-polished or done with smaller rotary tools if needed.
- Replating or coating if needed: If your silver item is rhodium-plated (common for silver to prevent tarnish) and that plating has worn off, a jeweller can rhodium-plate the piece anew after cleaning – restoring a bright white, tarnish-resistant finish. For pieces with intentional oxidation that got lost, they can also reapply oxidisation (through chemicals like liver of sulphur) after polishing, to put the black back into recesses.
- Final steps: After mechanical polishing, they’ll often ultrasonic and steam again to remove any polishing compound, then give it a final hand polish with a clean cloth. The result is a piece as shiny as the day it was made.
- Inspection and repairs: They typically check that stones are tight after cleaning (ultrasonic’s vibration can sometimes loosen settings slightly). If something is loose, they may advise fixing it (tightening prongs, etc.).
What to expect:
Your jewellery will come back very clean and shiny. If there were scratches, many may be gone if buffed out, though deep dents or dings in silver might remain unless specifically filed/polished out (which removes more metal and might not be done unless requested). Any cloudy gemstones will likely be bright again, and tarnish will be gone. If the piece had a matte finish intentionally (like brushed silver look), make sure to tell the jeweller not to high-polish it – they can clean matte surfaces by ultrasonic/steam without polishing them smooth.
Professional cleaning is usually worth it for valuable pieces or those with tricky components. Also, if you have a lot of silver jewellery and not much time, a jeweller can clean them all relatively quickly with their equipment. Cost varies – some offer it free, others might charge per piece or a small fee especially if re-plating is involved.
For very old or valuable silver (heirloom jewellery or artefacts), you might even consult a conservator or a museum service. They will use the gentlest methods (like the chalk paste mentioned earlier) to preserve the piece’s integrity. This is usually beyond what’s needed for modern jewellery, but it’s good to know such services exist if you have something truly irreplaceable.
Finally, after investing in cleaning your silver, you’ll want to keep it tarnish-free as long as possible. So let’s discuss special situations like cleaning jewellery with stones, detailed designs, coated finishes, and then general mistakes to avoid and storage tips.
Special care for silver jewellery with gemstones and pearls
Silver jewellery often includes gemstones, pearls, enamel, or other materials. Cleaning these pieces requires extra caution because what’s good for silver might be harmful to other components. Here’s how to approach cleaning silver jewellery with stones or organic materials:
General rule: The presence of gemstones or pearls usually rules out the harsher methods like chemical dips, ammonia-based cleaners, ultrasonics (for many stones), and steam. You’ll lean towards mild, manual cleaning.
- Diamonds, Rubies, Sapphires (the hard, tough gems): These are the least sensitive. If they are securely set in a silver piece, you can usually clean the whole piece as if it were plain silver with a few exceptions. Ultrasonic cleaners and steam are commonly used on diamonds and sapphires, provided the stones are not fracture-filled or treated. Fracture-filled diamonds (filled with leaded glass) or clarity-treated rubies/sapphires can be damaged by ultrasonics – the filling may be dislodged or the stone’s appearance altered. Since you often can’t tell if a stone has such treatments, if there’s any doubt, avoid ultrasonics on them. But untreated diamonds, rubies, sapphires are generally safe to ultrasonic and steam. Chemical silver dips won’t harm these stones physically, but the issue is the mounting: don’t soak a piece with stones in a dip for long, because the dip can seep behind stones and be hard to rinse out thoroughly, and it might affect any foil-back or closed-back settings (older jewellery sometimes had foil behind stones – rare in modern pieces, though). Best approach: mild soapy water and a soft brush. You can usually remove tarnish on the silver by polishing around the stones with a cloth or using the baking soda foil method (which is generally safe for hard stones because it’s not hot enough to shock them if you use warm, not boiling, water). Rinse and dry well.
- Pearls: Pearls (and similarly cameos, coral, amber, opal, turquoise, lapis lazuli, malachite, and other organic or porous gemstones) are extremely sensitive to chemicals and heat. Never use dips, ultrasonic, or steam on these. The acid in dips can dissolve the calcium carbonate of pearls or coral. Ultrasonic vibrations can shatter or dull pearls, and the heat can cause cracking or discolouration. Pearls are often glued onto posts in jewellery; any soaking can loosen them. How to clean silver with pearls? Very carefully! The silver part can be polished with a cloth avoiding the pearls. One trick is to use a cotton bud or small piece of cloth dampened with silver cleaner and apply it only to the metal portions around the pearl (as one Reddit suggestion noted: dip a toothbrush in silver cleaner and carefully scrub the silver parts, keeping the pearl dry). You can also use the aluminium foil method but using washing soda (sodium carbonate) instead of baking soda and in warm (not hot) water for a very brief time – some jewellers have used that to clean tarnish off silver while not harming pearls. However, it’s a bit risky at home. Usually, just polishing what you can reach on the silver and accepting a little tarnish around the pearl (or having a professional remove the pearl temporarily to clean thoroughly) is the safer route. After cleaning, wipe the pearls gently with a damp cloth to remove any possible residues, as pearls themselves should be kept clean of sweat or perfume etc. too.
- Colored gems (amethyst, topaz, garnet, etc.): Most semi-precious stones are somewhere in between. They generally handle mild soapy water. But avoid harsh chemicals – for example, turquoise and malachite can be discoloured by chemicals or even by ultrasonic cleaning solution. Emeralds often have oil treatments that ultrasonic or steam will remove (making the stone look cloudy or revealing internal fractures). So for anything besides the big hard gems, default to no ultrasonic, no steam, no dip. Instead, use a soft toothbrush in warm water with a little mild soap (like a gentle dish soap) to clean the jewellery. Work around stones carefully. You can use a polishing cloth on the silver parts, but avoid rubbing the cloth on softer gems as the impregnated chemicals might scratch or cloud them.
- Enamel or other coatings: If your silver jewellery has enamel inlays or an epoxy resin, do not submerge it in any cleaning chemicals or hot water, as that could cause discoloration or detachment. Stick to wiping the silver with a damp cloth or polishing cloth, carefully avoiding the enamel areas (which you can gently wipe with just water).
- Glass stones or CZ: Cubic zirconia and glass crystals (like Swarovski) are typically fine with gentle cleaning, but again, they can sometimes be foil-backed (especially older ones or cheaper jewellery). If a stone has a foil backing, any soaking or chemicals can ruin that foil and thus the stone’s look. So, treat costume jewellery with glued or foil-backed stones very gingerly – a polishing cloth on the exposed silver is best, and maybe a slightly damp cloth to wipe the stones’ top surface. CZs themselves are hard and can take ultrasonic, but the piece they’re in might not (if it’s silver-plated or glued, etc.).
A method for silver with stones: If tarnish is light, stick to a polishing cloth on the silver parts. If tarnish is heavy, one method is to use the aluminium foil baking soda method but in warm water for a short time – many gemstones (except those extremely sensitive like opal) can handle warm (not boiling) water briefly. For example, placing a tarnished silver ring with an amethyst in a warm soda/aluminium bath for 30 seconds can remove tarnish and likely not harm the amethyst. But be cautious – never use this on something like opal or turquoise; they don’t like soaking or abrupt temperature changes. Always err on the side of cooler water and shorter time if you try, and ensure immediate thorough drying.
After cleaning: Always check the stone settings after any cleaning. Vibration or temperature changes can loosen stones (the GIA recommends checking gems are secure after cleaning. If a stone moved, you might hear a rattle – that means you should get it tightened by a jeweller.
In short, gentle is the keyword for gemstone silver jewellery. It’s often better to tolerate a hint of tarnish than to risk damage to a gem or pearl. If in doubt, consult a professional jeweller who can often clean around stones safely, or remove the stones if necessary during cleaning (for example, pearls can be unstrung or unmounted, cleaned, then put back).
Cleaning intricate or detailed silver jewellery (filigree, engraving)
Ornate silver pieces – like filigree earrings, bracelets with lots of scrollwork, or rings with engraved designs – look stunning but can be tricky to clean. Tarnish often settles into all the tiny recesses, and dirt can accumulate too. Here’s how to tackle these detailed items without harming them:
Challenges with intricate designs:
- Tiny crevices hold tarnish that a cloth can’t reach.
- If using polish, it’s hard to get the residue out of all the nooks.
- If the piece is supposed to have dark oxidation in the recesses (antique style), you don’t want to remove all of it.
- Delicate parts like filigree wires can bend if you scrub too hard.
Recommended methods:
- Silver dip (with care): As mentioned earlier, dips can over-clean detailed silver by removing all tarnish including the patina in grooves. If your goal is to make the piece uniformly bright, a dip will do it. Use the cotton swab method: apply the dip locally with a swab or soft brush so you only target heavily tarnished zones, rather than dunking the whole piece for long. Rinse immediately. This way, you might leave a bit of tarnish in deeper recesses for contrast, while cleaning the visible surfaces. If you do submerge the whole piece, do it briefly and be prepared that it might lose the dark background completely.
- Foil and baking soda method: This works well for filigree and chains because it gets everywhere. It will remove tarnish from every crevice, similar to a dip, but perhaps a little more gently. If you want to keep some intentional darkness, shorten the time or concentration so it only partially cleans. Otherwise, it’s excellent for making a dark, detailed piece shiny again in all the holes. After doing this, you’ll definitely want to polish/burnish the high spots with a cloth – that gives definition (shiny tops vs still slightly grey crevices). One advantage of this method for filigree is that it doesn’t leave polish residue, so you don’t have white gunk stuck in patterns (which can happen if you use paste polish and can’t rinse it all).
- Brushes and picks: If using a cream polish, arm yourself with some tools: soft baby toothbrushes, or artist’s paintbrushes (for applying polish into detailed areas), and toothpicks or cotton buds to work the polish around and then remove it. For example, you can apply polish with a small brush to an engraved locket, work it around, then use a toothpick wrapped in a tiny bit of cloth to get into the lines and pick up the polish and tarnish. It’s time-consuming but effective. Rinse if possible, or use a slightly damp cloth to wipe off residues.
- Ultrasonic cleaner: If the piece has no stones that forbid it, an ultrasonic can help shake out polish residues or dirt from intricate pieces after you’ve hand-polished them. It can also remove loosened tarnish particles after a mild chemical treatment. Just be cautious with very thin filigree wires – if they are broken or very flimsy, ultrasonic agitation could potentially cause them to break further or snag. Generally, solidly built filigree can handle it for a short cycle.
- Compressed air or air blower: One tricky part is drying intricate pieces. Water in crevices can cause spots or tarnish if left. You can use a can of compressed air (like for electronics) or a photographic blower to blow water out of crevices after rinsing. Alternatively, use a hair dryer on low (not too hot, especially if stones) to dry it thoroughly. This prevents those pesky water spots or residual moisture that could encourage faster tarnish.
Preserving intentional patina:
Many detailed silver pieces (like vintage style marcasite jewellery or Bali silver designs) have an oxidised finish – black in the recesses to accentuate the pattern. If you want to preserve that, avoid chemical dips and long electrolytic soaks. Instead, focus on polishing the raised parts only. For instance, take a polishing cloth or mild polish on a cloth and only polish the high surfaces, not digging into the grooves. You can even use masking techniques: some people put a bit of nail polish or wax in the deepest lines to protect them from cleaning, then remove it after. That’s advanced, but a thought. If you accidentally remove oxidation from where you wanted it, you can reapply it with a sulphur gel or solution (like liver of sulphur) carefully to just those areas, then rinse – but that’s for those comfortable with patination techniques.
Gentle handling:
Intricate often means delicate. Don’t apply too much force; let chemicals soak or multiple gentle attempts rather than one aggressive attempt. If it’s a filigree pendant, perhaps place it on a towel while cleaning so you’re not bending it in your fingers.
Summary for intricate pieces: A combination approach works well: Start with a soaking method (mild warm soda solution) to lift bulk tarnish, then spot-clean remaining tarnish with polish and tools, then rinse/dry. This way, you minimize harsh rubbing on fine details. The result will be a piece that’s clean but with its details intact and not overly “scrubbed”.
Next, we’ll discuss items that have special coatings or treatments on the silver (like e-coating, rhodium plating, or intentional oxidisation) and how that affects cleaning.
Cleaning silver jewellery with coatings (e-coating, rhodium plating, oxidised finishes)
Not all silver is just plain bare metal. Many silver jewellery pieces have surface treatments:
- E-coating (electroplating with a clear coat or color) – often a transparent lacquer or ceramic nano-coating to prevent tarnish.
- Rhodium plating – a thin plating of rhodium (a bright white metal) over silver, common in rings and necklaces to give a non-tarnish, scratch-resistant surface.
- Oxidised silver (antiqued) – an intentional black or grey patina on parts of the piece for style (as mentioned above for details).
Quite a number of our pieces have this plating over Sterling Silver. These treatments affect how you should clean the item:
E-coated silver:
- E-coating is basically a thin lacquer applied electrically. It’s designed to prevent tarnish by sealing the silver from air. If your silver jewellery hasn’t tarnished in ages, it might have such a coating. The coating can be clear or sometimes slightly tinted.
- Cleaning e-coated items: Because of the coating, you usually don’t need heavy tarnish removal – the tarnish can’t form under intact coating. The main issue is just dirt or oils on the surface. So, use very mild methods: a soft cloth, or mild soapy water rinse. Do not use silver polish or silver dip – those are intended to remove tarnish and could damage or strip the coating. For example, a solvent in a dip might dissolve the lacquer, or an abrasive polish will scratch it off. If you suspect an item is e-coated (often the seller or label will say tarnish-resistant or coated), just clean with a microfiber cloth or gentle dish soap and water.
- If an e-coated item does tarnish or get a yellowish tint, it may mean the coating has worn off in spots or has fine cracks. At that point, you can treat it like regular silver to remove tarnish, but know that you might end up removing more of the coating. Sometimes it’s better to have the piece re-coated. But if that’s not an option, you can carefully polish it – just be aware the protection will be gone and it may tarnish more going forward.
Rhodium-plated silver:
- Rhodium plating is common on high-end sterling silver (and on white gold too) to give a shiny, ultra-bright finish that doesn’t tarnish. Rhodium is in the platinum family and is extremely resistant to oxidation and wear (though the plating layer is usually only a few microns thick).
- Cleaning rhodium plated silver: Here you actually treat it more like you would gold or platinum jewellery: since rhodium doesn’t tarnish, you’re just cleaning dirt. Use a soft cloth or mild soapy water. You can also use a jewellery cleaner solution that is labeled safe for “silver and gold” etc., but do not use silver dips (they are pointless on rhodium and could seep under plating at any tiny wear spot, attacking the silver beneath). Do not use any abrasive polish – it will scratch the rhodium or even remove it. Rhodium is hard, but the layer is thin; aggressive polishing can wear it off especially on edges. So, no toothpaste (too abrasive), no baking soda paste scrubs. Just gentle cleaning is enough.
- If the silver is rhodium plated, you usually won’t see tarnish, only maybe some scratches over time. If it gets dull from fine scratches, you can have it re-polished and plated by a jeweller. But at home, stick to non-abrasive methods. A microfiber cloth to buff it and some gentle dish soap for any grime is sufficient.
Oxidised (blackened) silver:
- Many sterling pieces, particularly artisan or vintage-style ones, have deliberately darkened areas. This is often achieved with liver of sulphur (potassium sulfide) or other chemicals that oxidise the silver surface more deeply than natural tarnish. It gives that gunmetal grey or near-black look. Often the design is oxidised then the high points polished, giving contrast.
- Cleaning oxidised silver: The goal here is usually to clean the surface without stripping that dark oxidation from recesses. So you should avoid dips, foils, or anything that uniformly cleans. Instead, use a dry polishing method on the raised parts only. A polishing cloth is perfect – gently rub the exposed shiny areas to brighten them, but don’t aggressively rub the intentionally dark areas. If the whole piece is oxidised (like a fully blackened ring meant to look goth black), you basically just want to clean finger oils. Use a soft cloth; do not use chemical cleaners as they might lighten the black. If needed, just a damp cloth with a tiny bit of mild soap, then dry immediately.
- If an oxidised piece tarnishes further (even the black can get duller or whitish with corrosion products over a long time, and the exposed silver edges can tarnish), you can very carefully use something like a cotton swab with dilute baking soda paste to touch up the exposed edges, or the pencil eraser trick (a clean pencil eraser can sometimes polish a small spot of silver) – but again, protect the dark areas.
- One neat trick for cleaning detail without hurting patina: spot clean with toothpaste or a paste of baking soda on a cloth for specific shiny areas. People also mention using a bit of toothpaste on a brush to clean tarnish off silver around pearls or other areas while avoiding the pearls- similarly, you could use it to target only certain spots on an oxidised design.
- If you accidentally remove oxidation where you didn’t intend, you can re-oxidise by applying a sulfur solution (there are commercial oxidising solutions or liver of sulphur gel) with a fine brush to that spot, then rinsing. But that’s if you’re comfortable with that process; otherwise a jeweller can reapply it.
Storing silver jewellery and preventing tarnish
Proper storage is key to keeping your silver jewellery shining. Tarnish is inevitable over time, but we can significantly slow it down with the right precautions, meaning less frequent cleaning and less wear on the pieces. Here are tips for storage and tarnish prevention:
- Clean before storing: Always put your jewellery away clean and dry. Skin oils, sweat, or cosmetics left on silver can accelerate tarnish. So after wearing, give the piece a quick wipe with a soft cloth to remove fingerprints and moisture. If it needs a wash, do a gentle wash and dry it thoroughly before storage. Tarnish can form under dirt, so a clean piece stays untarnished longer.
- Individual, airtight storage: Silver tarnishes due to sulphur and oxygen in the air. The less air (and pollutants) it’s exposed to, the better. Store each piece in a sealed container if possible. Small zip-lock polyethylene bags (the small ziploc bags) are great – put one piece per bag to avoid scratching each other. Squeeze out as much air as you can before sealing. Make sure the bag is polyethylene or Mylar – do not use polyvinyl (PVC) bags like some cheaper plastic pouches, as PVC can emit vapours that actually cause tarnish and degrade over time. The bag also protects from humidity changes.
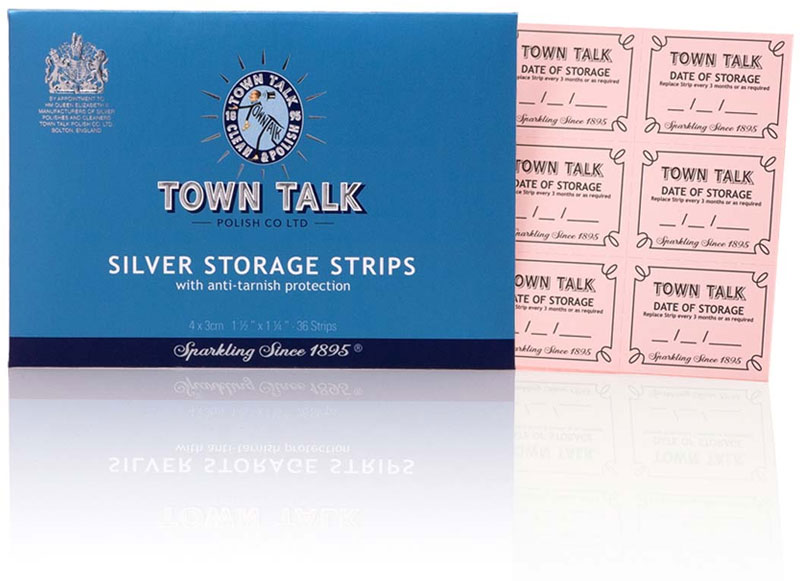
- Anti-tarnish strips or tabs: Include an anti-tarnish strip in the storage container. These are small paper tabs or strips treated with reactive chemicals that absorb sulphur compounds. Common brands are 3M Anti-Tarnish strips, etc. They can keep an enclosed space free of tarnish-causing gases for several months. Just remember to replace them as directed (they usually last 6 months to a year). They’re very useful if you’re storing jewellery in a display case or a jewellery box compartment – just slip a strip in there.
- Tarnish-inhibiting cloths/pouches: You can buy pouches or drawstring bags made of tarnish-inhibiting fabric (like Pacific Silvercloth). Storing silver in these can dramatically slow tarnish because the cloth is impregnated with silver or other metal particles that gobble up the sulphur first. For example, a silver necklace in a Pacific Silvercloth pouch will stay untarnished far longer than one in plain cotton. You can also wrap pieces in that cloth and then put them in a bag. Note: eventually the cloth saturates with sulphur, but this takes a long time; replace every couple of years or per manufacturer instructions.
- Low humidity environment: High humidity speeds up tarnish (water in air helps the chemical reactions). Storing silver in a dry place is better. Avoid storing in damp bathrooms or basements. If you have a lot of silver, consider a dessicant like silica gel in the storage area. For instance, in a jewellery box, you could keep a small packet of dessicant (those “do not eat” silica packets that come with electronics or shoes) to absorb moisture. Some even use chalk pieces or rice, but silica gel is more effective and can be re-dried and reused. Aim for relative humidity below 50% where the silver is stored.
- Avoid sulfur sources: Don’t store silver directly on wood or felt or cardboard that isn’t archival – wood, especially oak, and some glues, emit sulfur that quickly tarnishes silver. That’s why museum cases either paint wood with sealants or use inert materials. If you have a nice wooden jewellery box, line the compartment with acid-free, sulfur-free tissue paper or a piece of anti-tarnish cloth. Also, keep silver away from rubber bands or foam which can have sulphur.
- Keep pieces separate: Silver is a soft metal; to avoid scratches, store pieces so they don’t rub each other. Necklaces can be put in separate pouches or compartments. If you have a chain, closing the clasp and maybe coiling it loosely can prevent tangling and knotting which can also trap moisture.
- Wear your jewellery! Interestingly, regular wearing can actually help delay tarnish (on plain silver, not necessarily with pearls). The friction and oils from your skin can polish the silver slightly. You might notice a ring you wear daily hardly tarnishes, whereas one left in a box does. Of course, sweat and chemicals on skin can cause tarnish too for some people, but typically, moderate wear plus periodic gentle cleaning is fine. Just be sure to clean it occasionally and not expose it to harsh chemicals (remove silver rings when using bleach, cleaning agents, or in pools – chlorine is a big culprit for staining silver).
- Periodic check-ups: Even with good storage, check your silver every few months. If you see a faint yellowish tint starting, it’s easier to clean at that stage with a quick polish than after it turns black. Tarnish is cumulative, so addressing it early means less work.
- Avoid latex and wool in storage: For example, do not wrap silver in wool cloth – wool contains sulfur. And latex (like some types of foam or gloves) can also cause tarnish. Use nitrile gloves if handling silver for storage (nitrile has no sulfur, whereas some latex glove formulations do).
- Lacquering or clear coating: Some people choose to lacquer silver to prevent tarnish. Museums sometimes do this for display pieces with products like Incralac or Agateen lacquer. However, lacquering jewelry is tricky – if not done perfectly, it can look uneven or wear off and cause worse tarnish under the chipped areas. Generally, for jewellery that’s worn, lacquering is not recommended – it won’t hold up to abrasion. Rhodium plating is a better option for a protective clear (well, rhodium is a metal) coat on frequently worn silver. Clear wax (microcrystalline wax) is sometimes used by conservators as a very thin removable coating, but on jewellery it might rub off. So, probably best to rely on physical storage methods rather than coatings, unless the piece is purely for display.
By following these storage tips, you can greatly slow down the return of tarnish. Some people report that with anti-tarnish bags or strips, their silver stays almost pristine for years. While you likely can’t avoid cleaning forever, you’ll be doing it much less often, and the cleaning will be easier because tarnish will be lighter.